Corrective Actions
When an Incident Report has been submitted, the WHS team may wish to record corrective actions that were applied.
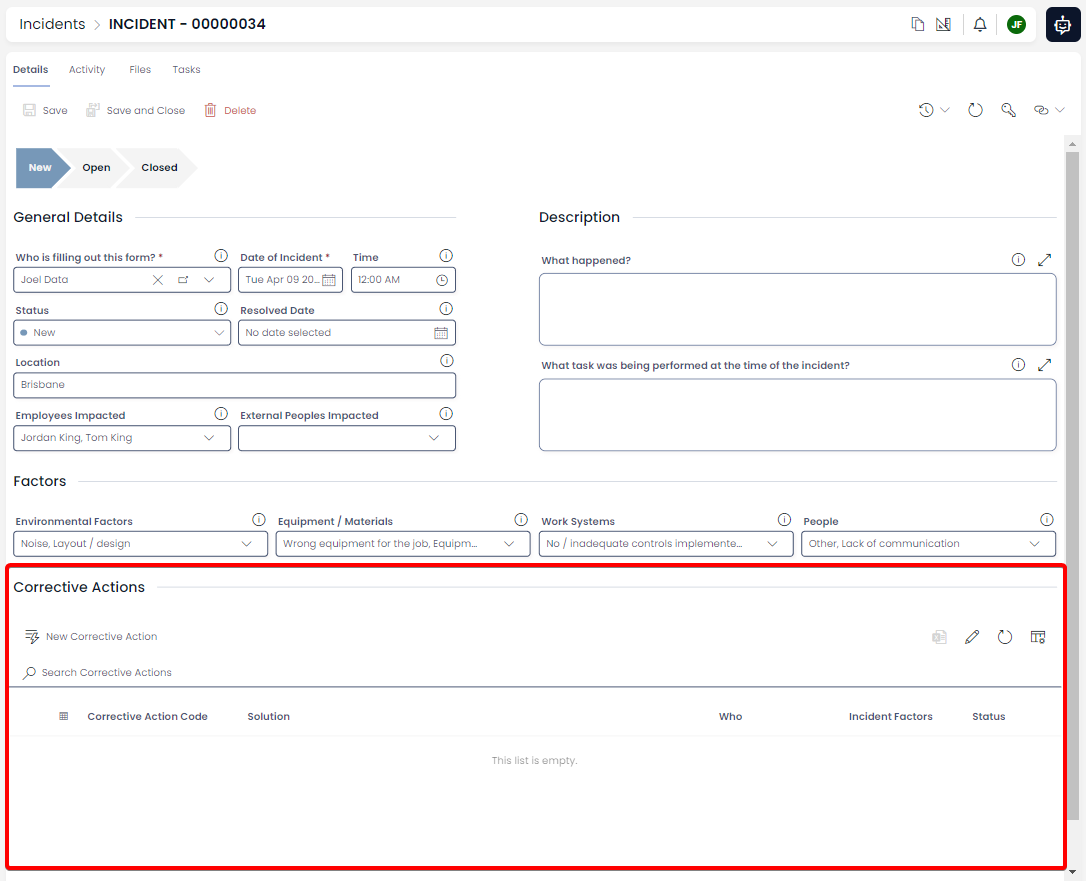
The Corrective Actions data table is hidden by default on the Sidebar. However, the item page for each Incident Report will provide access to this data table, so that you can log corrective actions against the current Incident Report that is opened.
Creating a New Corrective Action
To create a new Corrective Action:
- Ensure you are viewing the Details page of an Incident (pictured above).
- Press the New Corrective Action button in the table's Command Bar

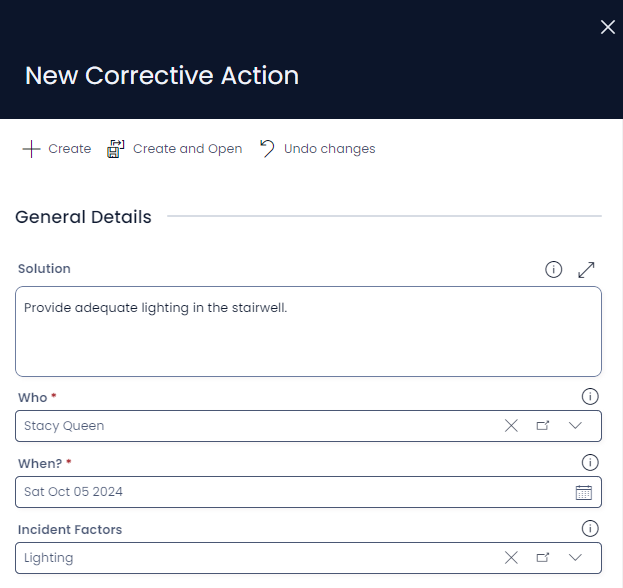
- The New Corrective Action create screen will open in a side panel
- Enter the details for the Corrective Action
- Press + Create or Create and Open at the top of the side panel
Corrective Action Process
-
When a new Corrective Action item is created, a task will automatically be assigned to the user listed in the Who lookup field, and they will be notified.
-
The title of this task will read
WHS: Corrective Action - Solution. However,Solutionwill be replaced with the text that was entered into the Solution field of the Corrective Action.
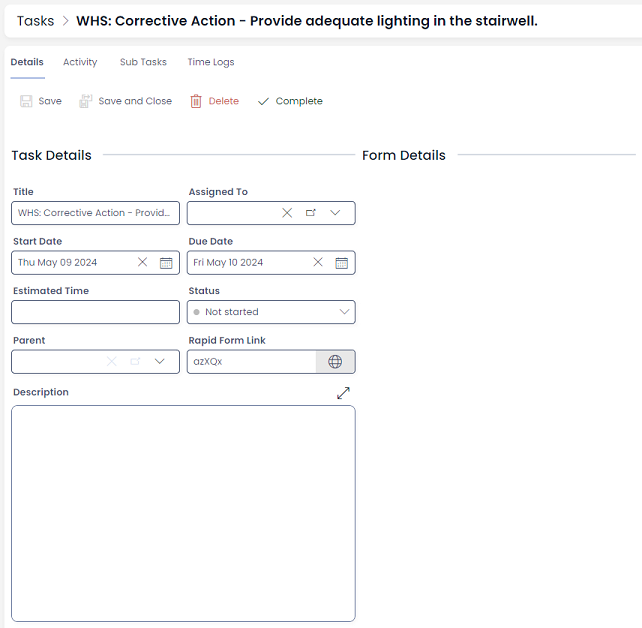
An example task assigned to a user for actioning.
- The task also provides a Rapid Form Link, so that the user can add additional notes if required.

- When the task's status has been set to Completed, a confirmation task will be sent to the WHS team to check that the Corrective Action has been completed correctly.
The confirmation task will contain an Embedded Form to assist the WHS team in confirming the Corrective Action.
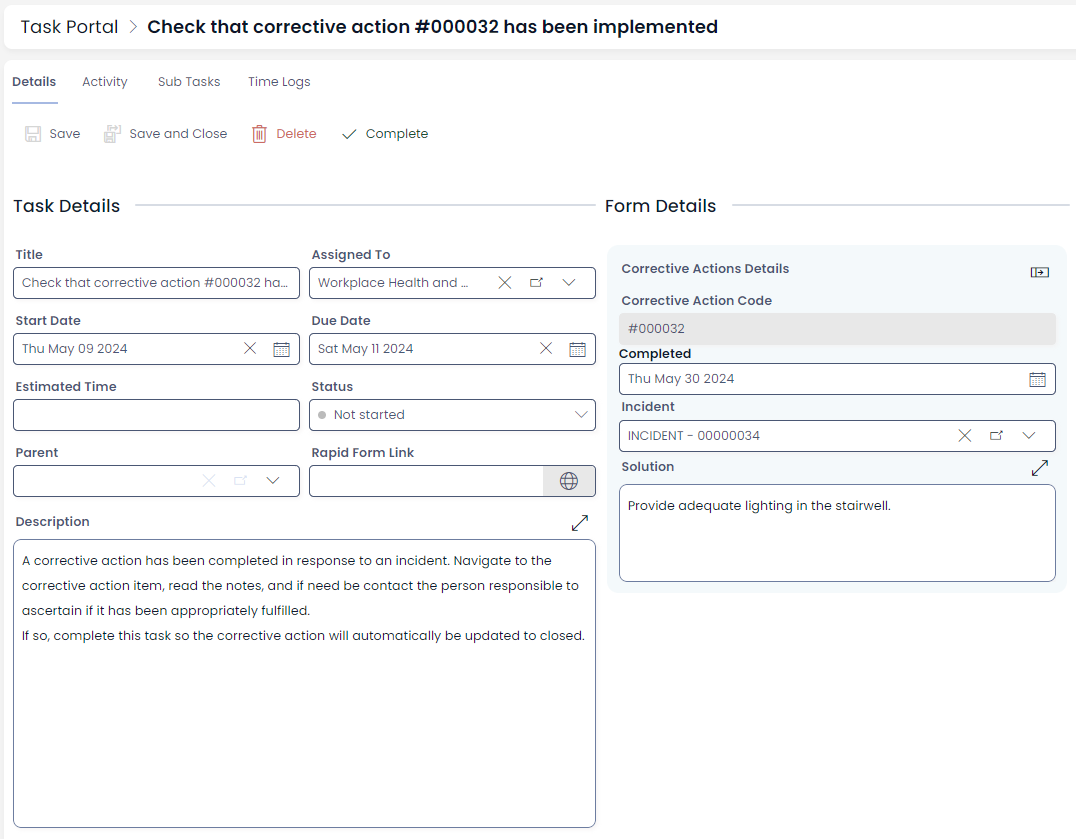
An example confirmation task for a Corrective Action. The title of the confirmation task will read: "Check that corrective action #000000 has been implemented."
Viewing a Corrective Action
To view a Corrective Action:
- Ensure you are viewing the Details page of an Incident
- Select the Corrective Action from the data table at the bottom of the Details page

The Corrective Action item page will resemble the following:
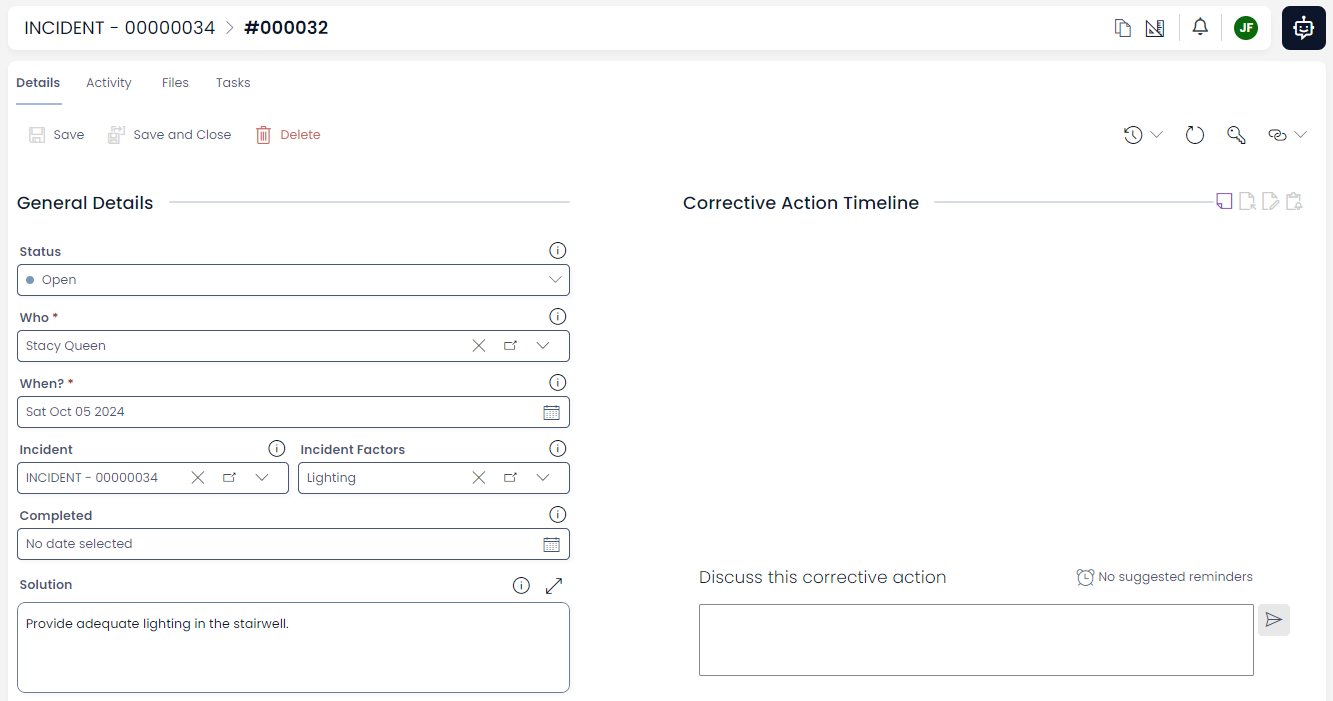
Each new corrective action is automatically allocated an Action Code ID number. Below is a list of the fields present in the Corrective Action item, and what they are used for:
| Field | Description |
|---|---|
| Status | Used to describe the state of the corrective action. I can be set to Open, Completed and Unchecked, Closed and Archived. |
| Who | A lookup field to indicate who is responsible for the Corrective Action and making sure it is implemented. This person will receive a generated task as a reminder to complete the Corrective Action. |
| When? | When the incident occurred. |
| Incident | This is a lookup field connected to the Incident item. This field should be automatically connected to an Incident when the Corrective Action is created using the data table on an Incident details page. |
| Incident Factors | Here the WHS Team can indicate an incident factor that will be addressed by the Corrective Action. |
| Completed | The date that the Corrective Action is completed. |
| Solution | A text field with the description of what is needed to solve the issue. |